Turakawak Shrine location and walkthrough in Zelda: Tears of the Kingdom
How to complete the Turakawak Shrine in Zelda: Tears of the Kingdom, including its location and the full “Stacking a Path” puzzle solution.
This article references relevant content from the polygon.com website. Original article link: [https://www.polygon.com/zelda-tears-of-the-kingdom-guide/23743961/turakamik-shrine-location-stacking-path-chest]
Turakawak Shrine is a shrine within The Legend of Zelda: Tears of the Kingdom’s Tabantha Frontier.
Our guide will help you find the Turakawak Shrine location, solve its puzzles, and walk you through the “Stacking a Path” to collect the chest and Light of Blessing.
When you’re done, our shrine locations page or interactive Hyrule map can direct you toward something else to do.
Turakawak Shrine location
Turakawak Shrine is located in the Tabantha Frontier region. It’s relatively accessible on foot, just make sure you have some fire elemental items like fire fruit or Red Chuchu jelly so you can burn through the brush blocking it. Its exact coordinates are: (-3496, -0198, 0066).
Turakawak Shrine walkthrough
As the name suggests, this shrine will have you stacking blocks with Ultrahand in order to complete the shrine. It can be a bit tricky to figure out where the chest is and how to stack the blocks correctly to complete the shrine, so look closely at how we did it.
1. You start off in a room with a metal block and an upper area. Walk up to the metal block sitting in front of Link. Use Ultrahand to move it next to the wall and climb up it to reach the raised floor.
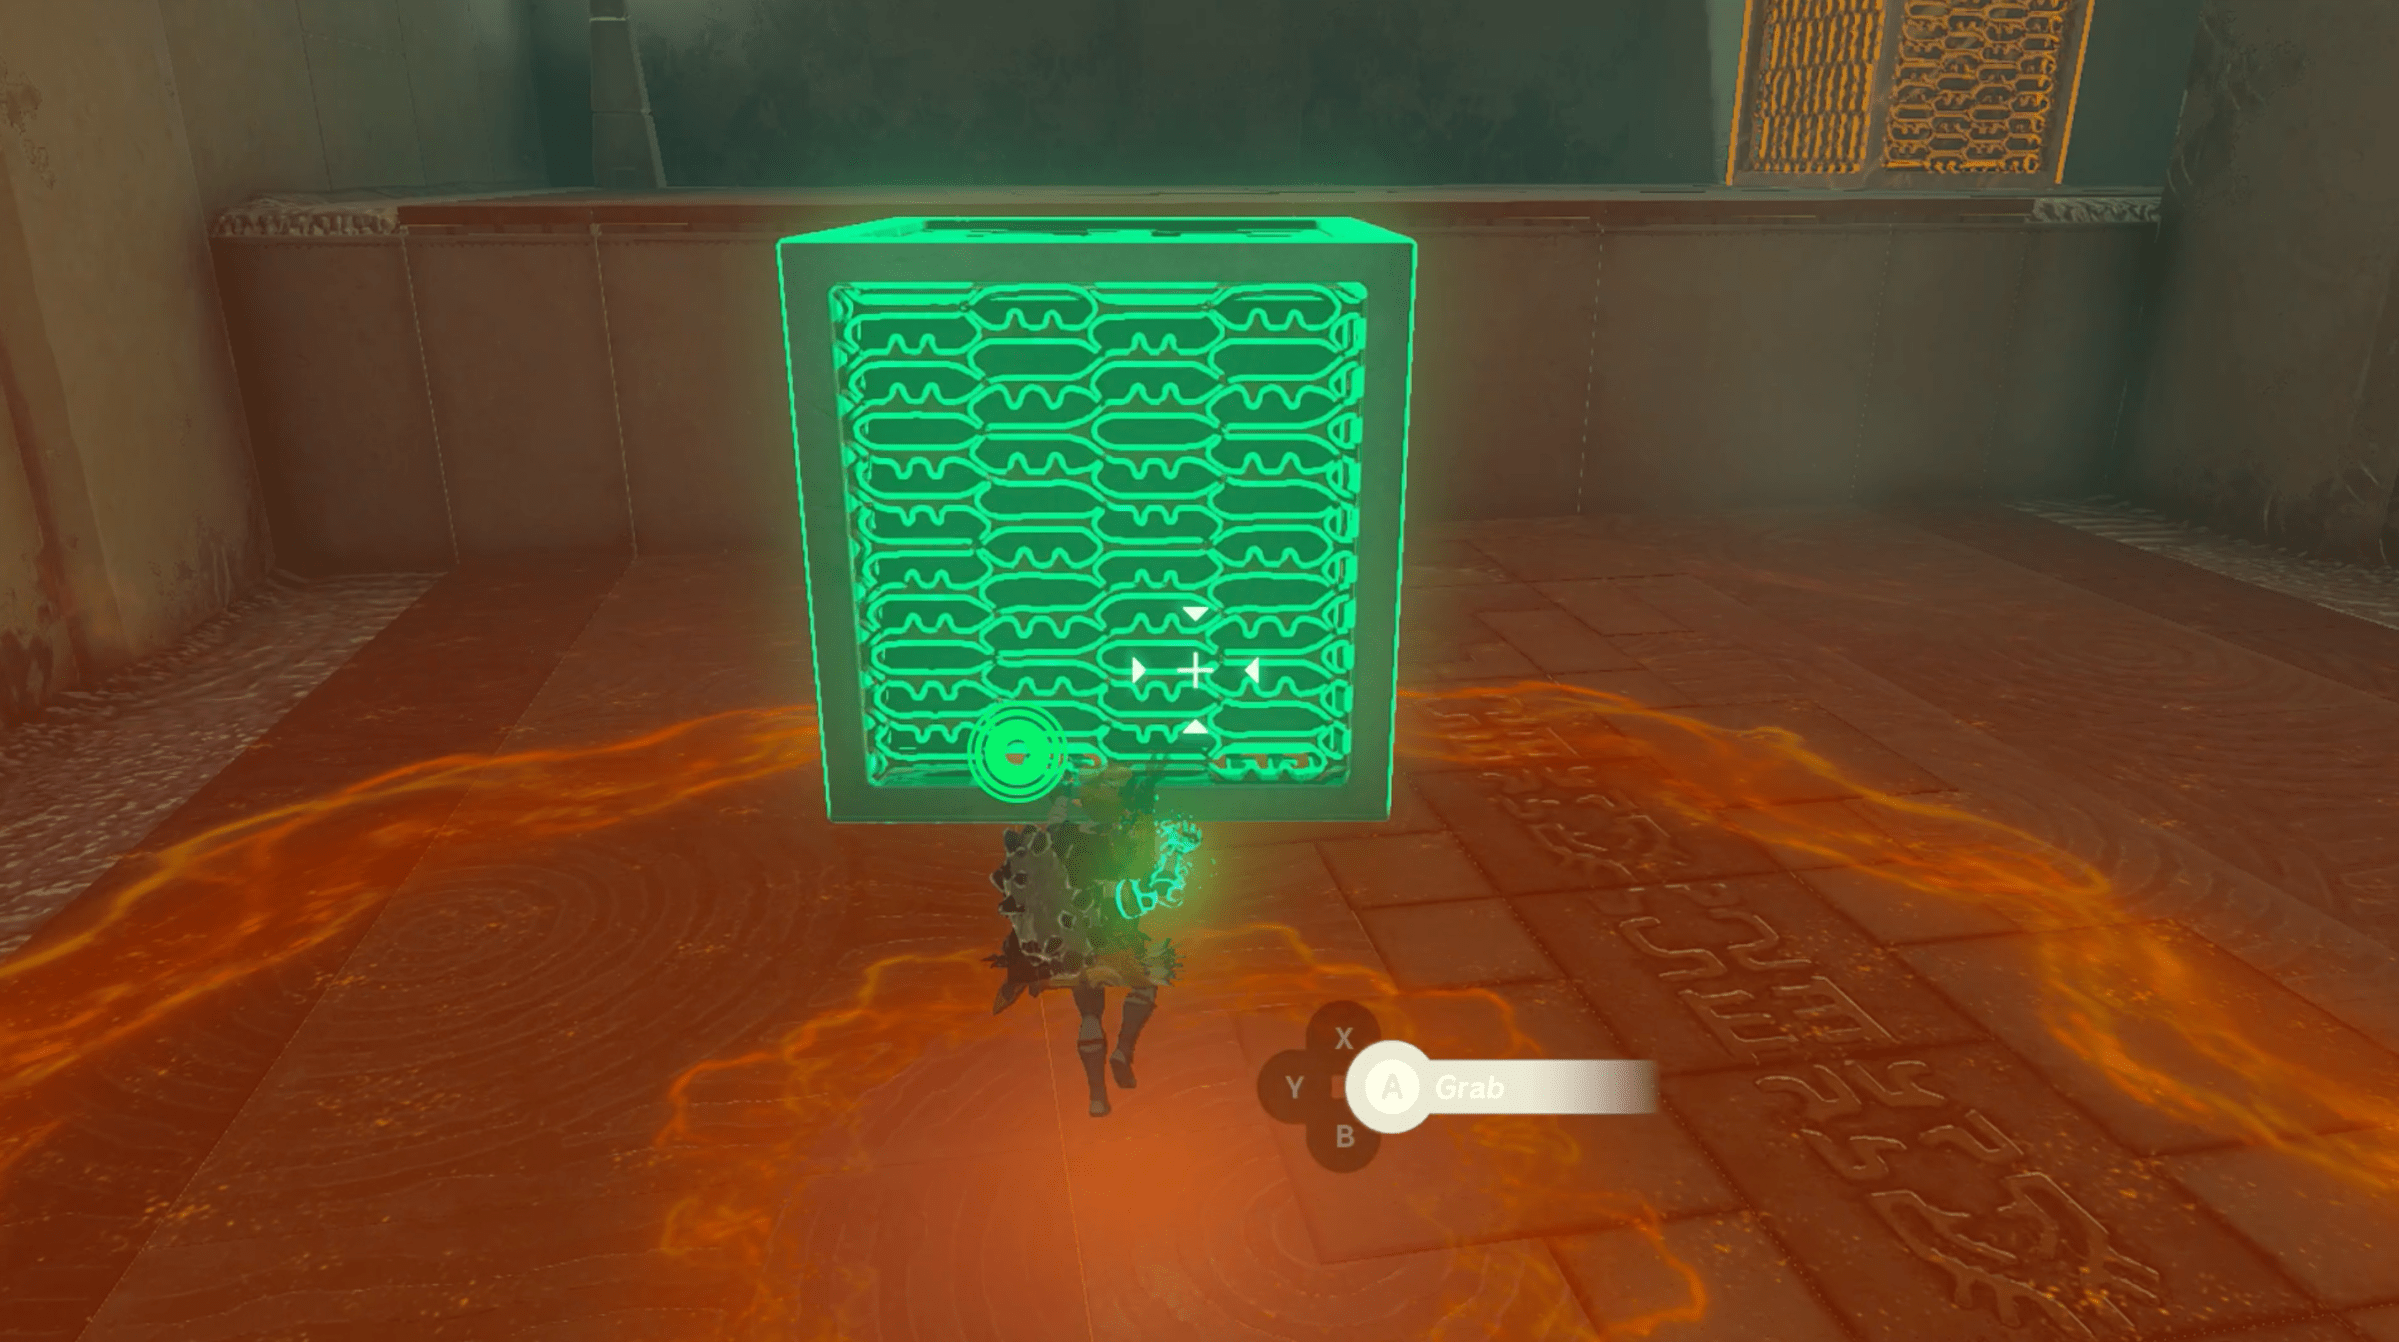
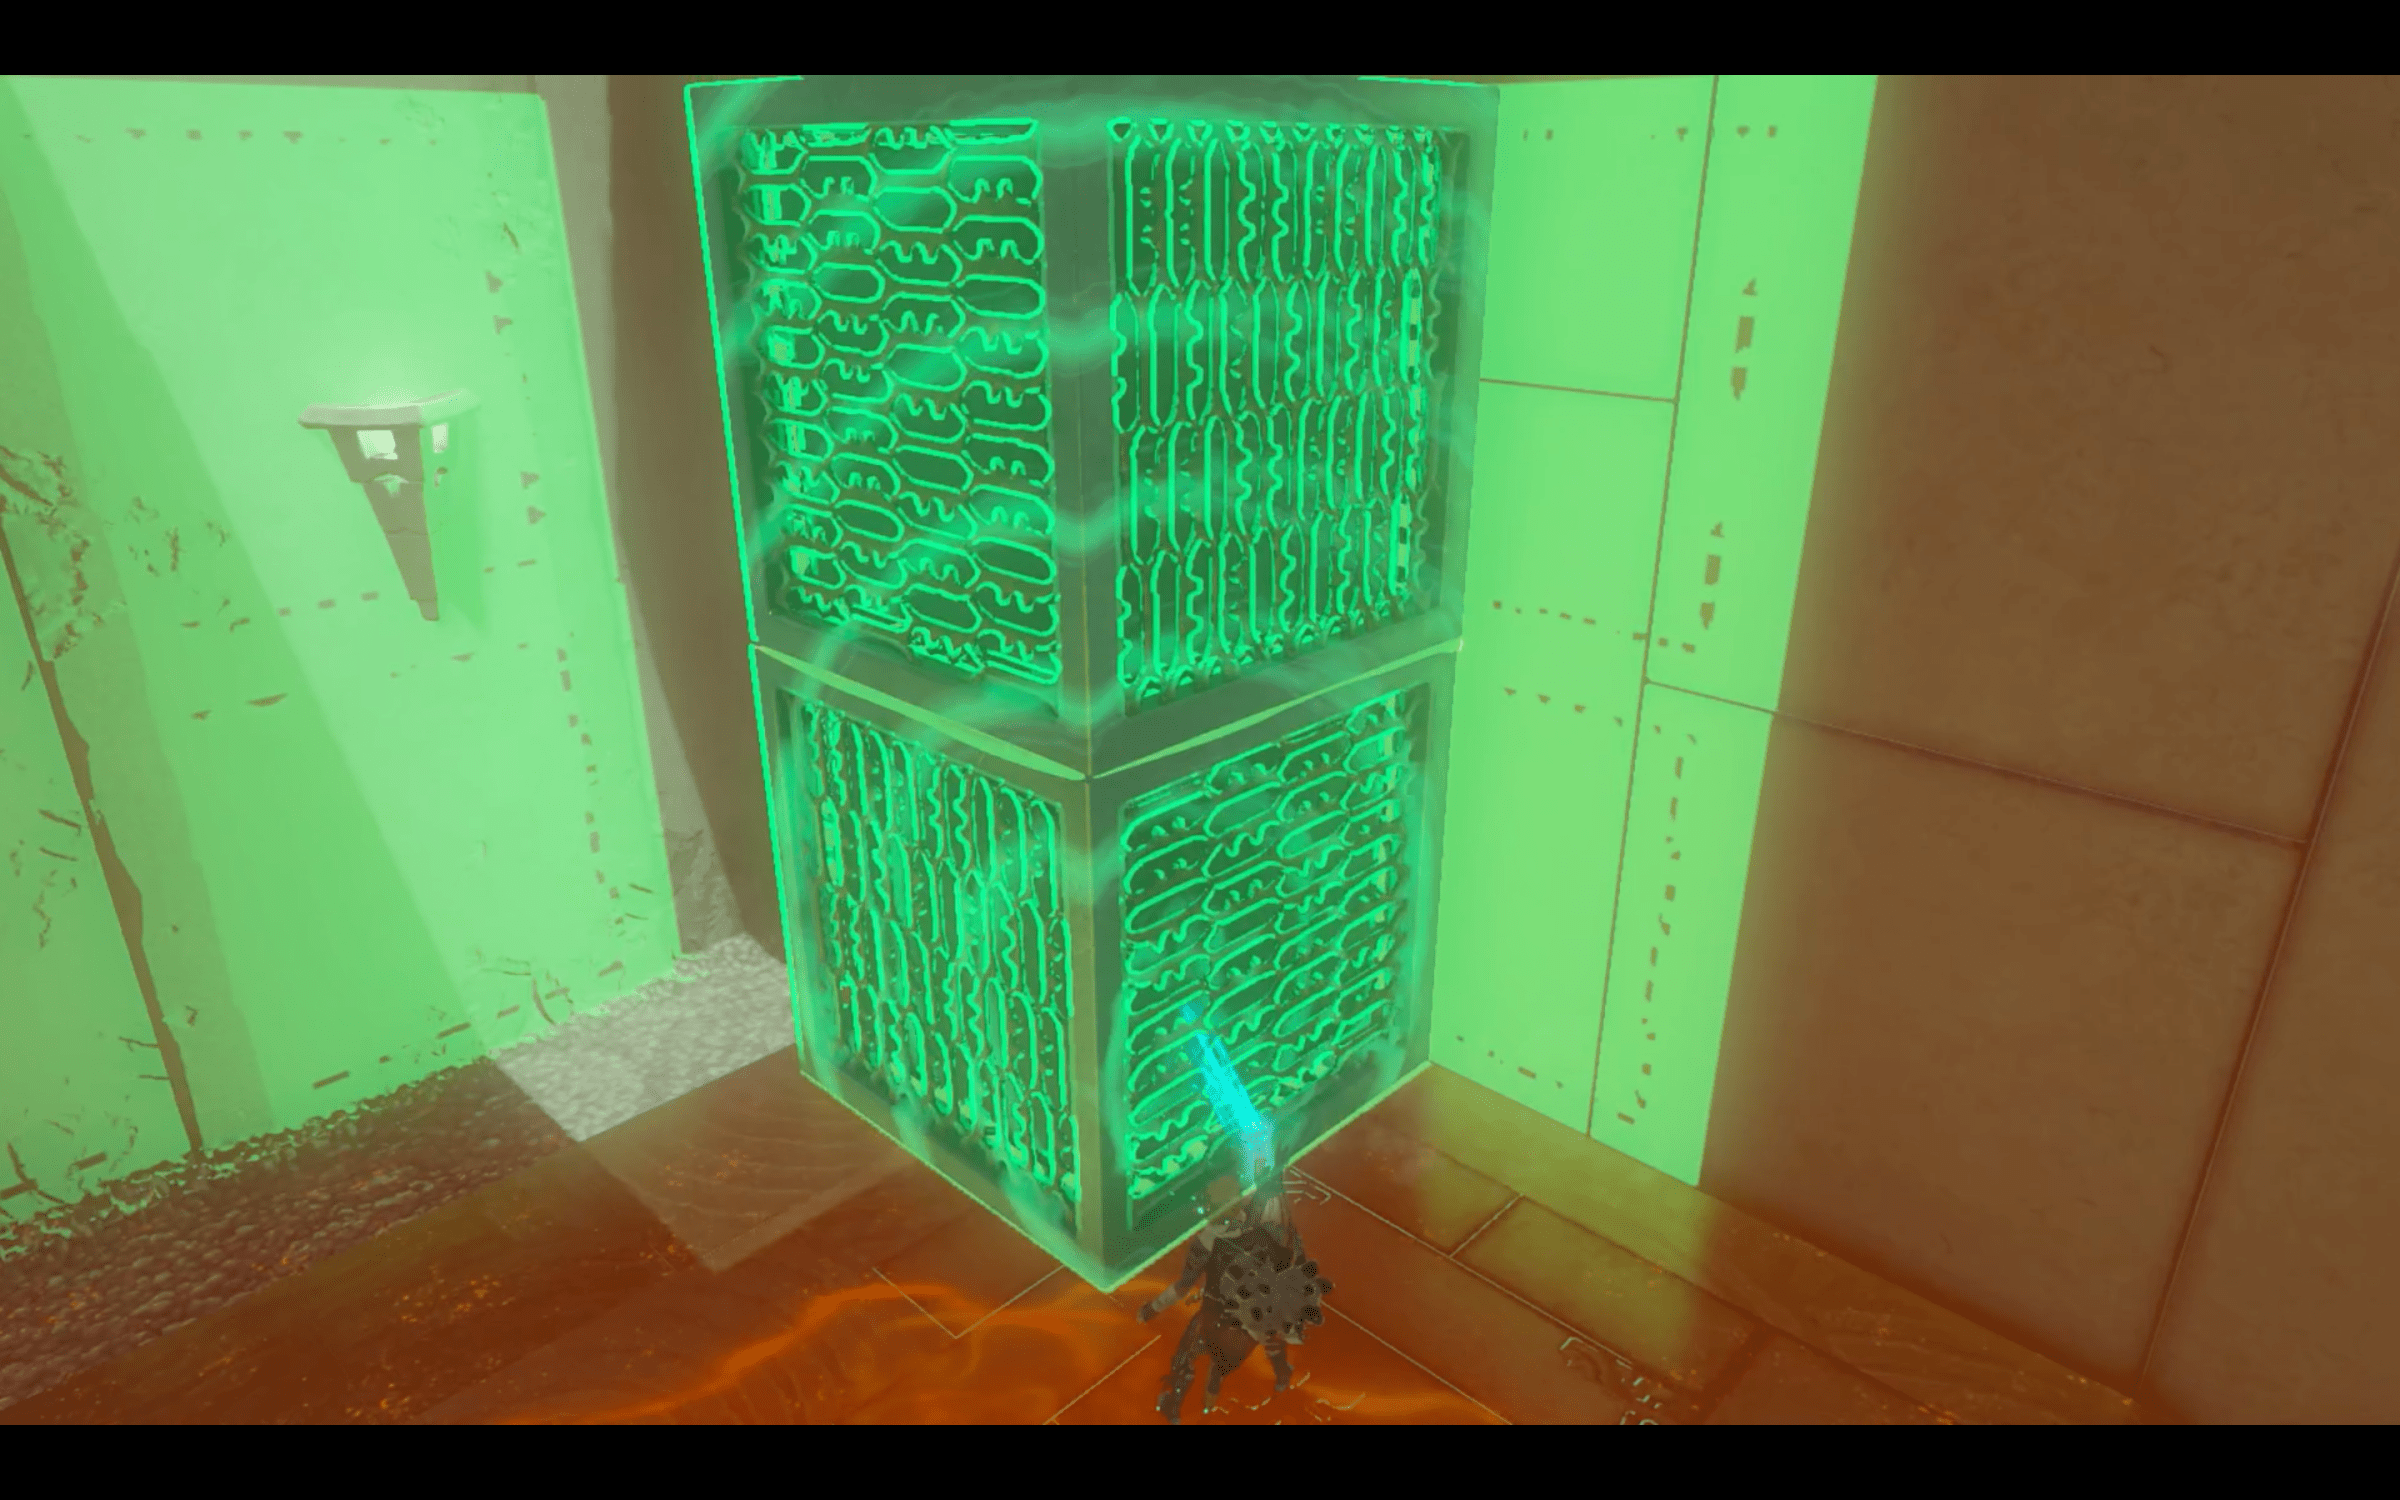
2. You’re now on a higher floor and there is a second block there. Use Ultrahand on the block you just climbed up on and stack it on top of the other metal block. Use Ultrahand to attach it to the other block so it forms a stable structure comprising of two blocks.
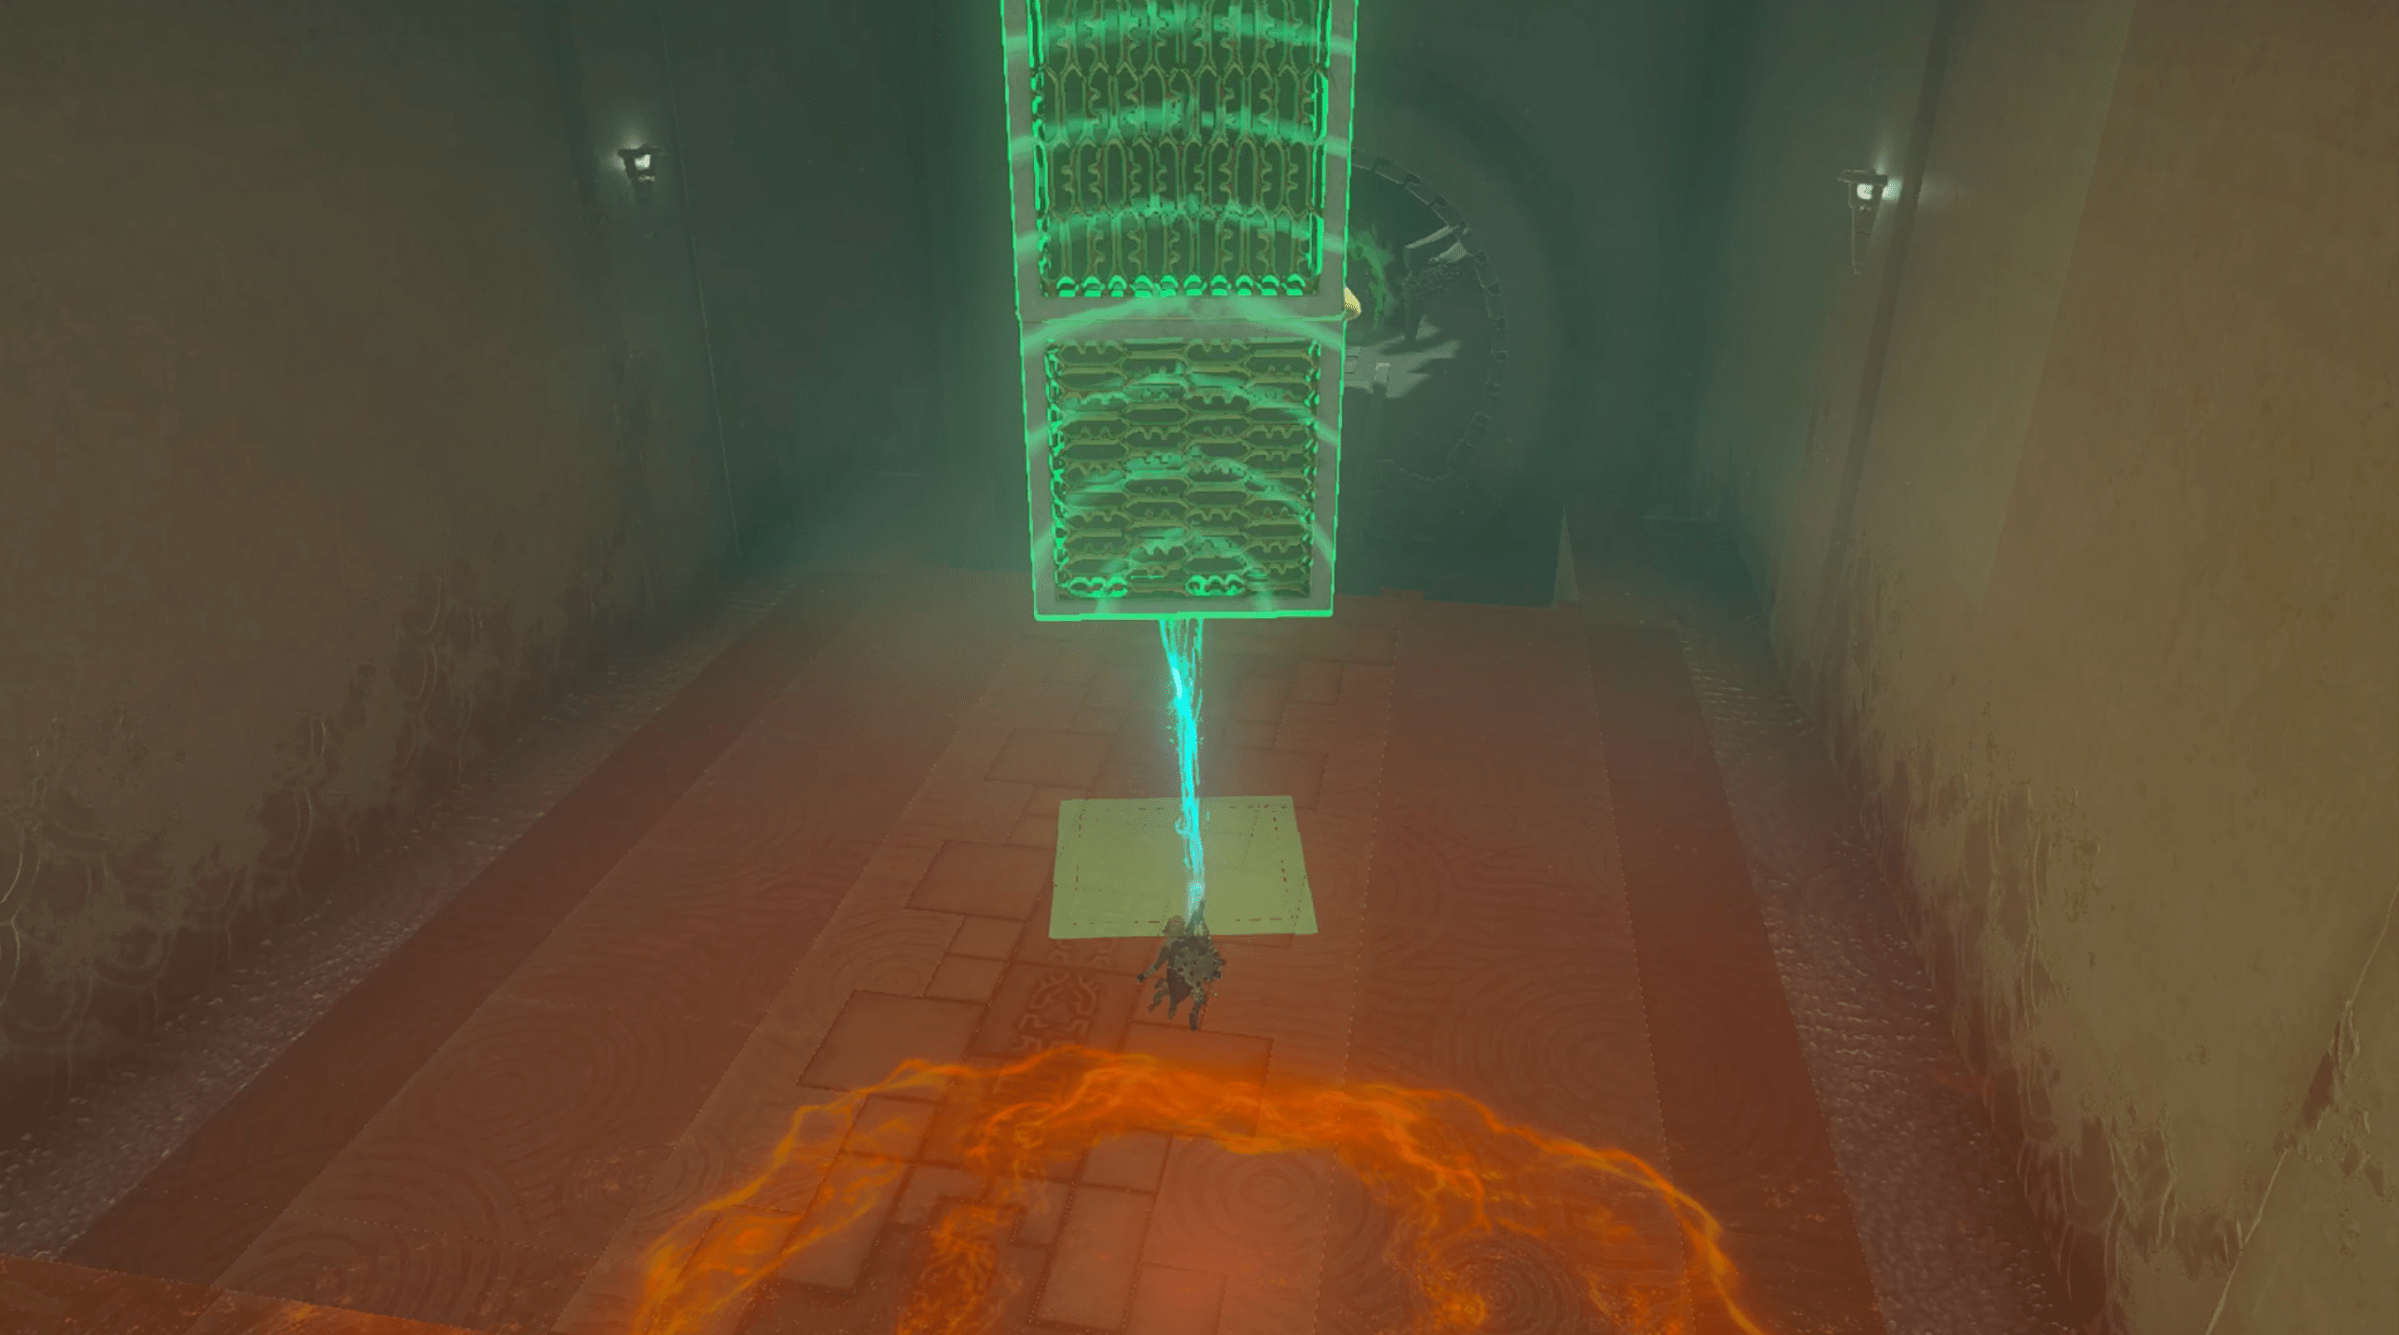
3. There is a hidden chest you can get now. It is well hidden. It is technically on the floor above but it is only accessible via this area. Look up towards the ceiling and you will see a metal grate hanging above the lower area.
4. Use Ultrahand and place the two stacked blocks underneath the metal grate. Climb up the blocks.
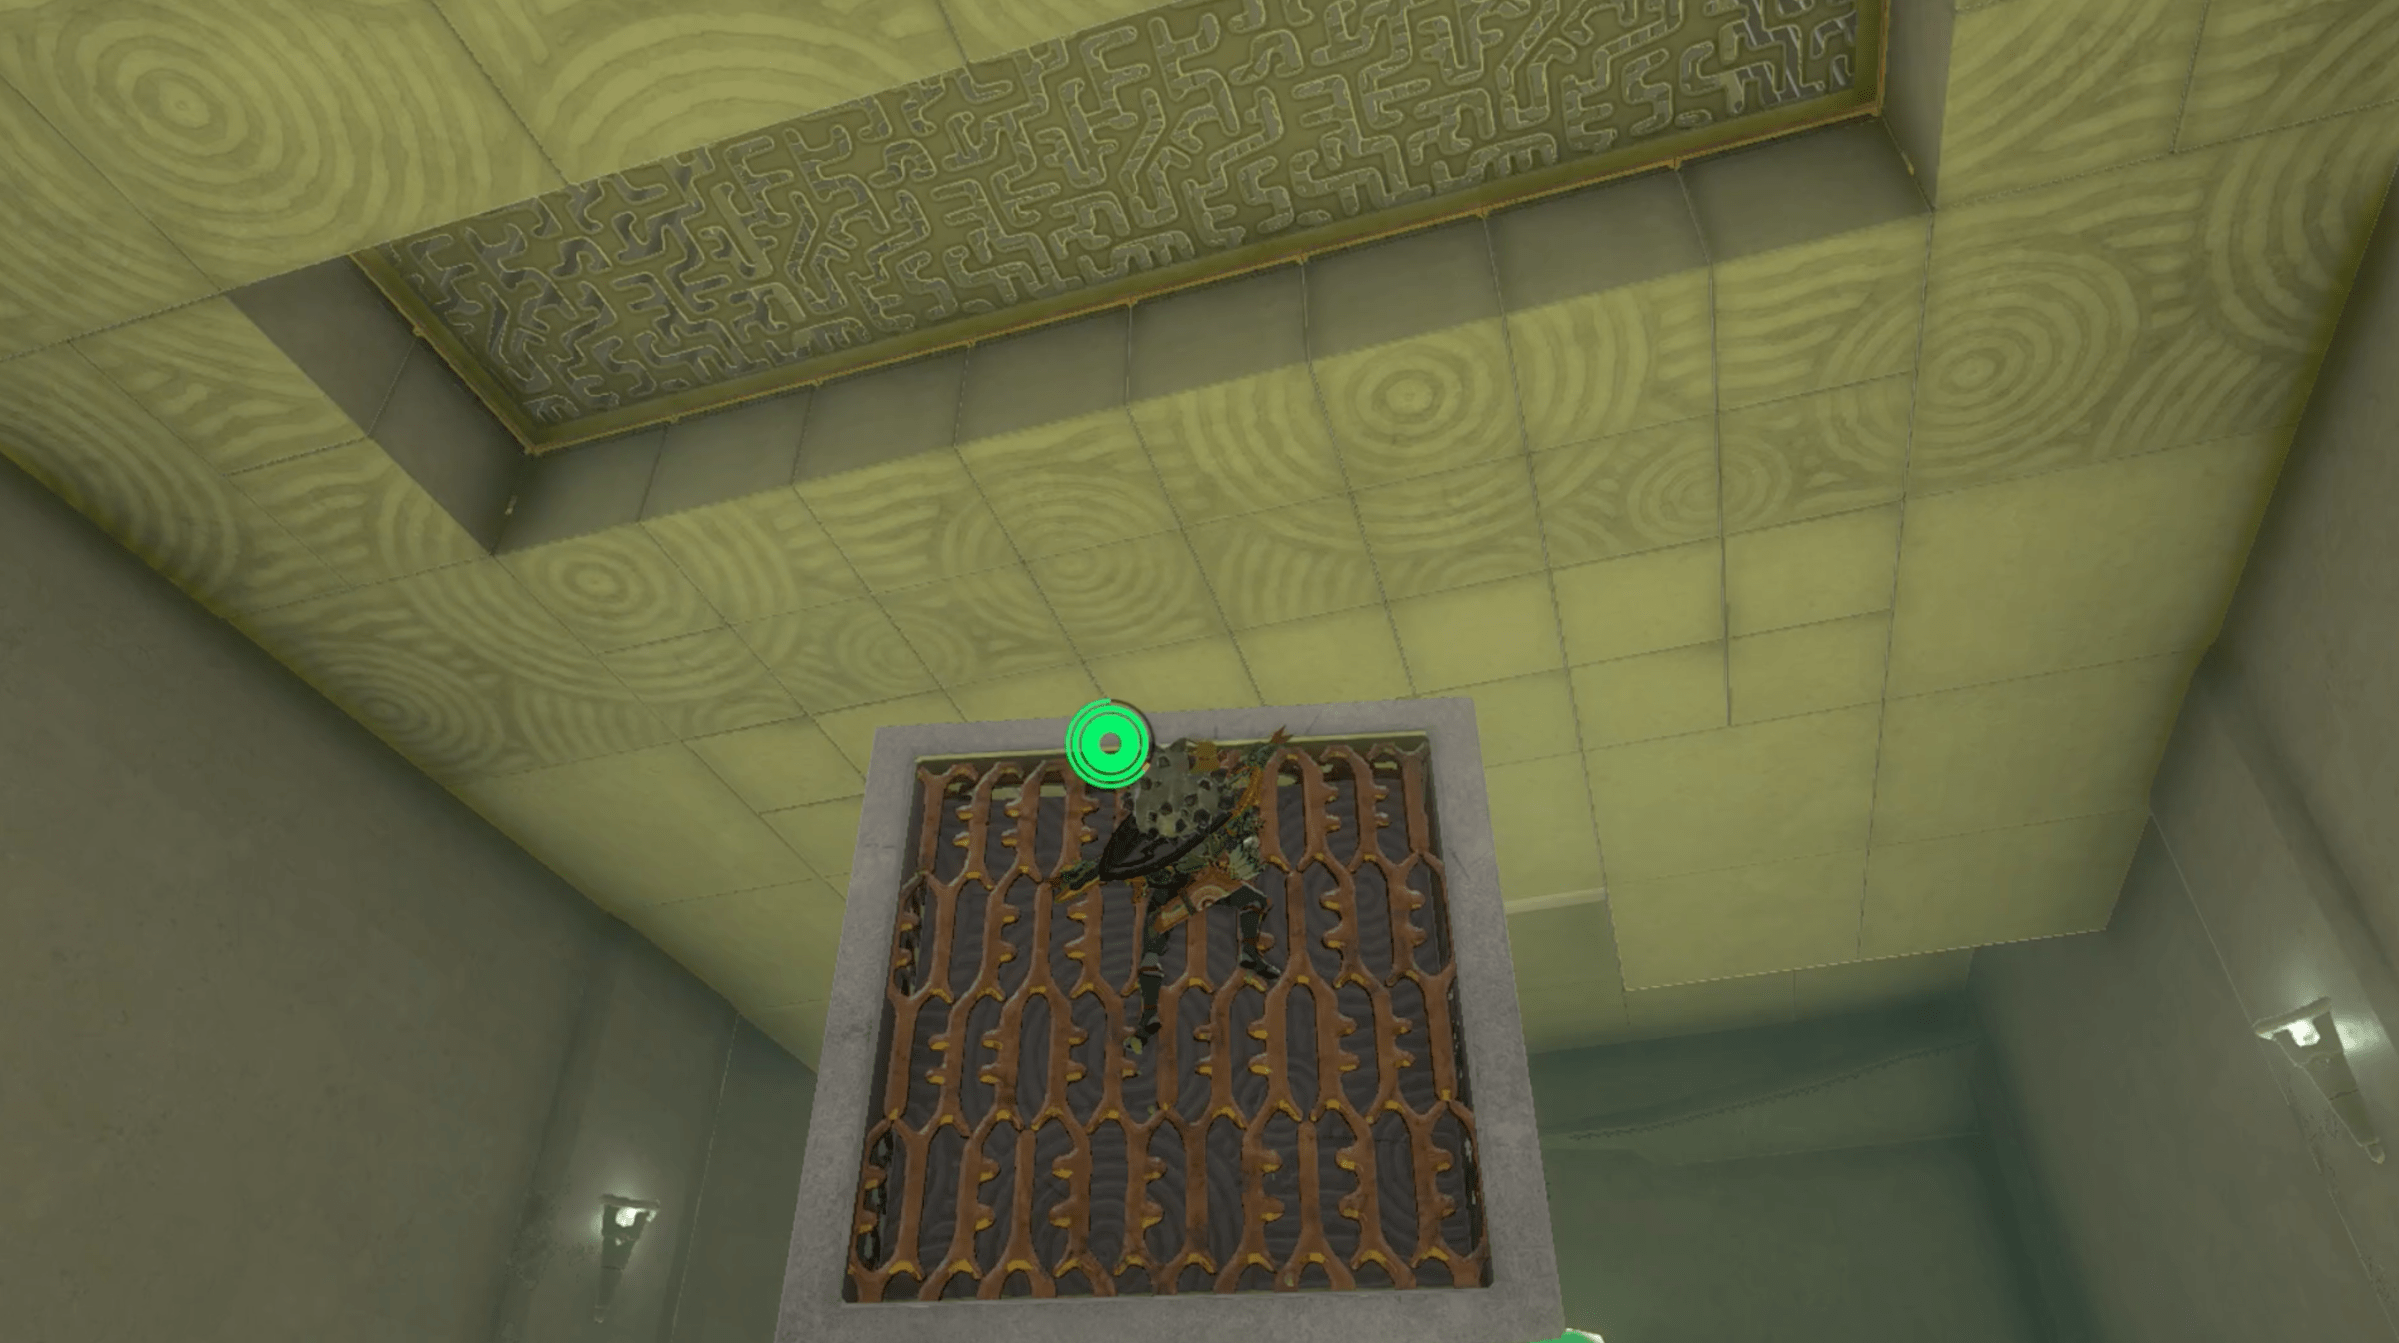
5. Once you climb up, you’ll be high up enough to use the Ascend ability on the grate above you. Use Ascend and arrive in the room with a chest. Open it to get a magic rod.
6. Exit the area with the chest using Ascend. You’re on a higher floor now. Backtrack to the lower room where you made the tower of two blocks. You’ll need them to complete the shrine.
7. Once you are back in the room where you stacked the blocks, grab them once again and place them so they line up with the ladder that leads to the higher room you just came from.
8. Climb up the blocks and up the ladder to get into the higher room. Using Ultrahand, grab the two stacks of blocks and bring them onto the upper level.
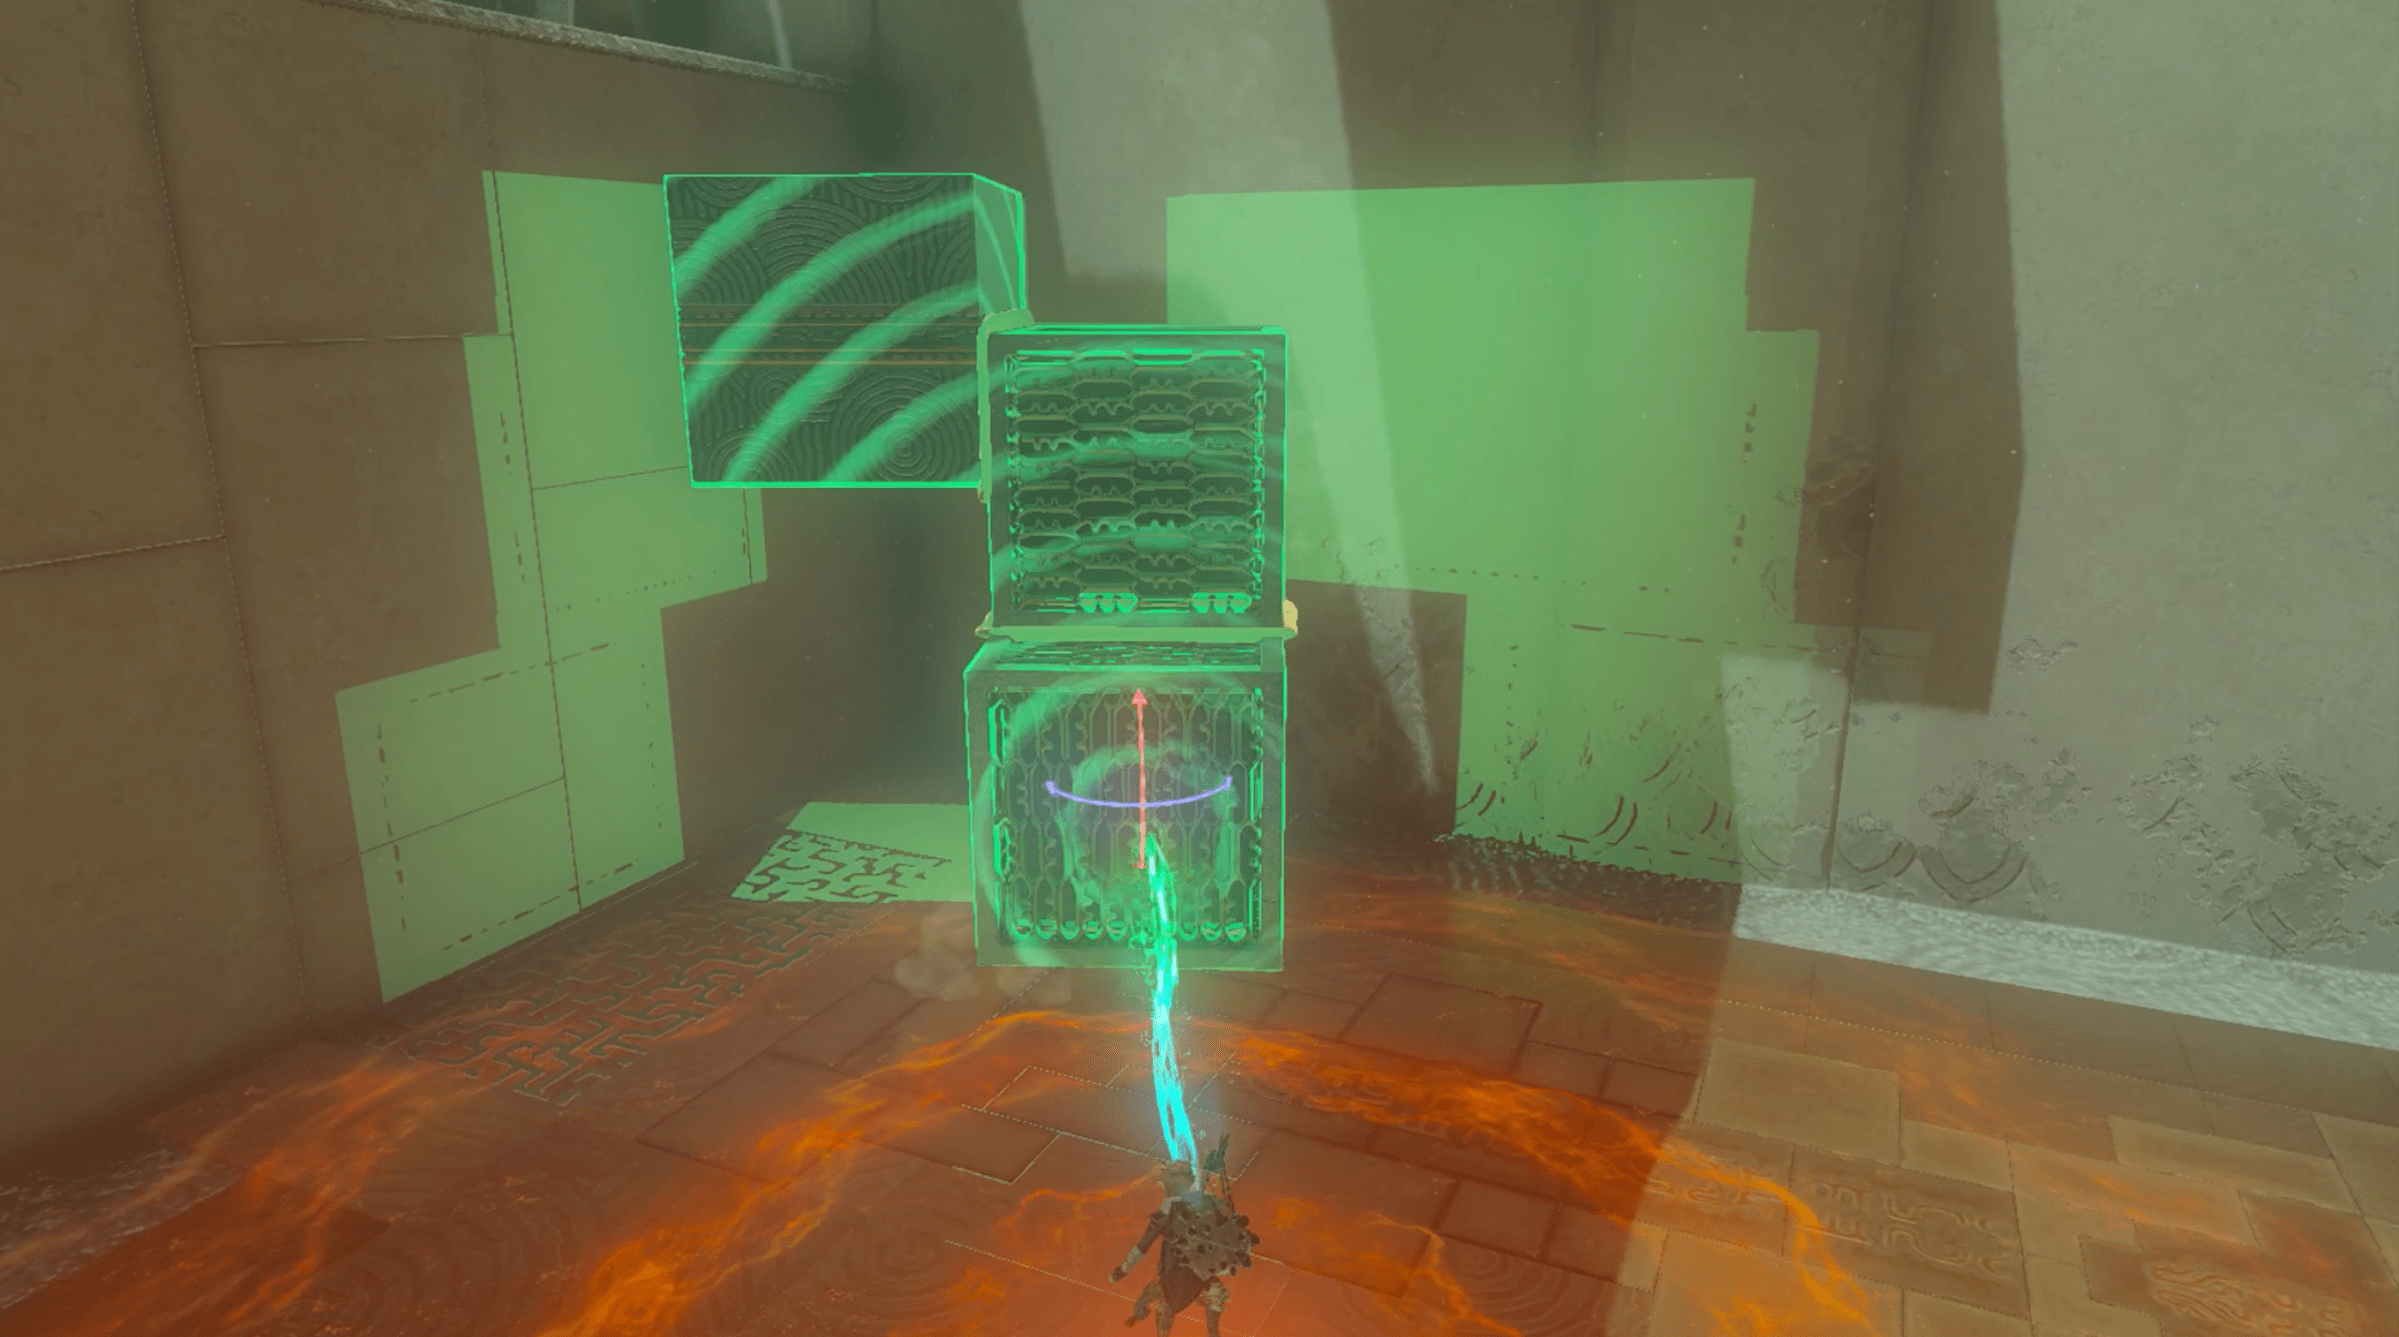
9. This room has a third block, except for this one you can’t climb. Use it to build a path up to the end of the shrine.
9. You can’t stack the three blocks right up on top of each other since you can’t climb on one of the blocks. Use Ultrahand to attach it to the side of the climbable block. You will need to place it low enough so Link can jump up onto it from the other block without climbing, as pictured below.
10. If you are having trouble balancing the structure, prop the structure up against walls to help give it additional support.
11. Climb up and go collect your Light of Blessing.